Over the past year, I’ve been sharing clippings from my garden and starting propagations for friends and family. Everyone who knows me, knows that gifting is my love language, so how fitting is it that I get to share these tiny green gifts with the people I care about. It makes me so happy seeing them nurture these tiny green gifts and even start their own gardening journey!
This idea of sharing and nurturing reminds me of the annual winery events my dear friend, Sri, hosts. For years, she brought friends together to enjoy wine tastings alongside her delicious home cooked meals. It had been a while since those gatherings, so Sri decided to bring them back this year! ☺️ A few weeks ago, I had the chance to meet up with my girlfriends (my forever travel ladies!) for a weekend of wine, inside jokes, and laughter…lots of it! And of course, Sri’s amazing homemade breads and spreads!

I also brought along some mint propagations to share with a few girlfriends who were just as excited about them as I was!

Which brings me to this blog post. I figured, what better way to share the love than by passing on some of my favorite tips for growing mint. Whether you’re a seasoned gardener or a complete beginner, these tips will help you grow mint successfully from clippings, and keep your plants thriving year round!
Note: The following is based on my own trial and error and what works best for me in my zoning area.
Mint 101:
Mint is invasive. Unless you want your garden to be filled with mint, it’s best to plant it in a pot rather than in-ground to keep it from spreading…with no return!
Sunshine is essential. Mint thrives in sunny spots but can benefit from some afternoon shade to avoid burning in hotter climates.
Moist but not soggy. Mint prefers moist soil but can’t handle standing water, so make sure the drainage is good.
An herb that loves to be used. Don’t be afraid to harvest your mint often! The more you trim it, the more it’ll grow. It’s happy to be cut back, so feel free to use it in your meals or beverages.
A perennial plant. Mint comes back every year, so no need to worry about replanting it season after season!
Mint Propagation Tips:
Mint is incredibly easy to propagate, and it’s a great way to share the love with friends and family or start another plant of your own. Here’s how I do it:
- Cut the stems – Snip a healthy mint stem, just above a leaf node, leaving a few sets of leaves on top.
- Remove the lower leaves – You only need one or two sets of leaves at the top of the cutting.
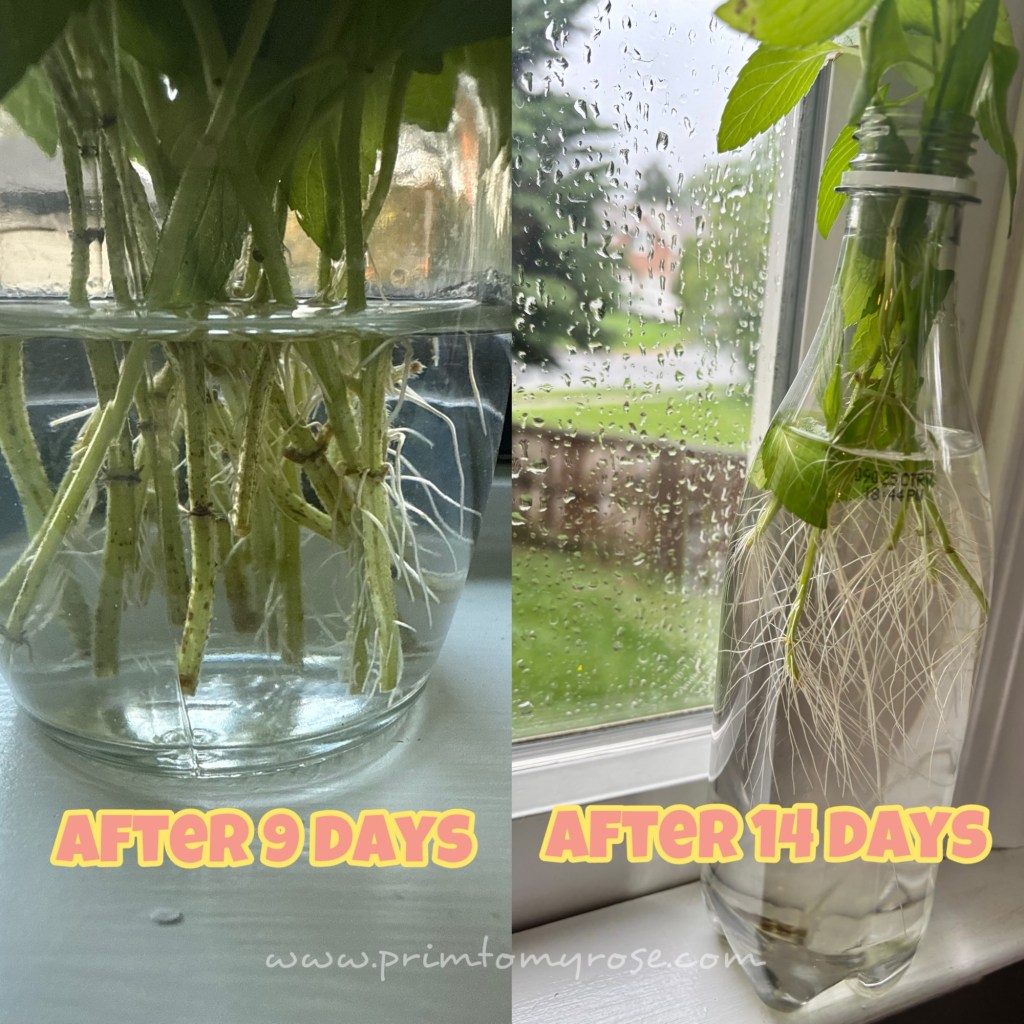
- Place in water – Put your cuttings in a glass of water or recycled water bottle, and place it near a bright window or outside where it gets some light.
- Change the water regularly – Once a week, swap out the water to keep things fresh and clear.
- Wait for roots – After about 1-2 weeks, roots should start forming. Once they reach about 1-2 inches long, it’s time to transplant them to soil.
- Transplant to soil – When you move the cuttings to soil, choose a pot with good drainage. Start with moist soil to prevent transplant shock. Mint is hardy, so it usually takes the switch easily.
- Tip – You can mix the water from your propagation glass or bottle into the new soil to help your plants get settled in. 😊 The mint may look droopy the first few days, just give it some time to get acclimated to it’s new home.
- Something to keep in mind: Typically, when I start any propagation indoors and before transplanting it to soil, I bring them outdoors for a couple days to help get it acclimated to it’s new environment. This is an added step to prevent transplant shock regardless of any plants’ hardiness.
Mint Watering:
- For the first few months, water your mint frequently to help the roots establish. Depending on the weather and if your plant is outdoors, this could mean watering every 2-3 days or more.
- Always check that the top 1-2 inches of soil are dry before watering again. Over-watering can lead to root rot, so it’s better to under-water than over-water.
- Best times to water: early morning or late evening (before or after the sun is at its strongest).
- Water at the base – Watering directly at the soil level helps prevent moisture on the leaves, which can lead to fungal diseases. Only occasionally do I water from the top to give the leaves a nice rinse. If doing so, make sure the sun isn’t too hot to avoid leaf scorch.
Harvesting:
- Cut, don’t pinch – Mint doesn’t like random leaves being pinched off. To encourage healthy regrowth, always cut just above the node (the little bump where new leaves will grow). This is where I snipped for the cuttings I gave to my friends! Cutting just below the node may cause damage to your mint or hinder its growth.
- REMOVE leaves with white spots or powdery mildew. These can be caused by several factors such as fungal disease or pest infestations like whiteflies or spider mites. You can also space your plants out to provide better air circulation, or spray them with neem oil, an organic pesticide and fungicide that’s great for garden care.
- Tip: I use neem oil on all of my plants and flowers. In the early mornings or late afternoons, when the sun isn’t too hot, I spray everything down to help prevent the spread of diseases and repel insects such as aphids, spiders, or other pests.
*As an Amazon Associate, I earn from qualifying purchases. I only share products I genuinely use and love — thank you for supporting my blog!

Remove leaves with white spots or powdery mildew
Winter Care:
- Cut back – When the weather gets cold, trim your mint plants back, ideally near the soil level. This will help them regenerate come spring.
- Freeze for later use – You can freeze mint leaves for up to 6 months, or pop them into an ice cube tray with water for your drinks! 🍹
- Let nature take its course – Personally, I leave my mint outside during the winter. The leaves from surrounding trees fall into the containers, offering a natural blanket of insulation. Depending on your setup, you can cover your pots with mulch or bring them indoors during the colder months.
Conclusion: Spread Love Through Gardening
I hope these tips help you grow your own mint (or pass along cuttings to loved ones). Whether you’re giving it as a gift or using it in your own cooking, mint is a simple way to spread a little love and share a bit of nature with those around you. Let me know how your mint propagations go! I’d love to hear all about it!
xoxo,
Jaybee
*Find all of our links here: Explore*
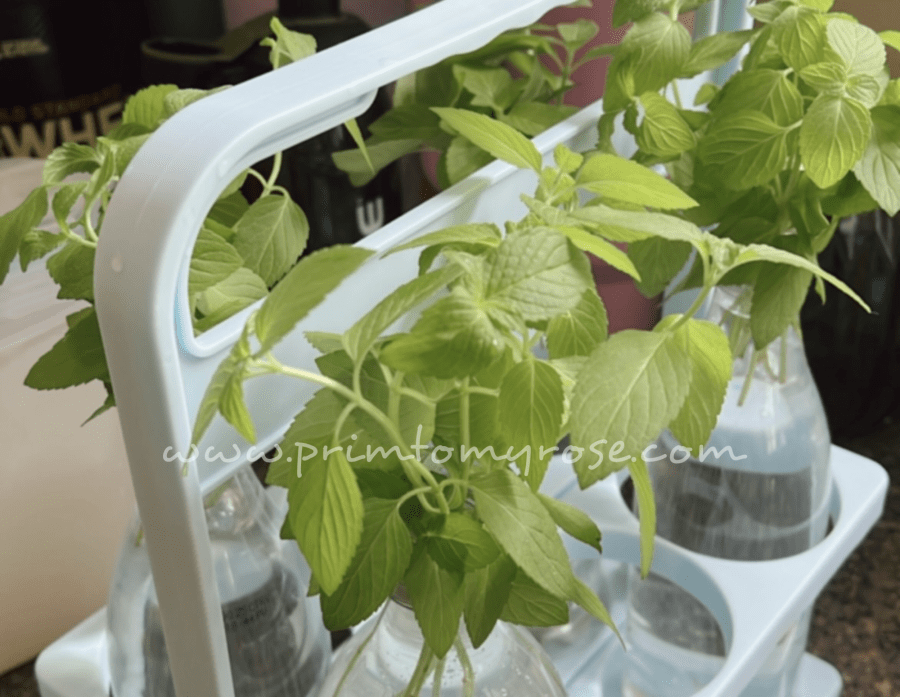
P.S. Check out these photos that my gal pals shared with me, from the mint propagation I gifted them!